In this guide, we’re going to teach you how to make a ghillie suit from scratch with the vital tips included. Are you ready to go? Let’s just do this.
Materials Required
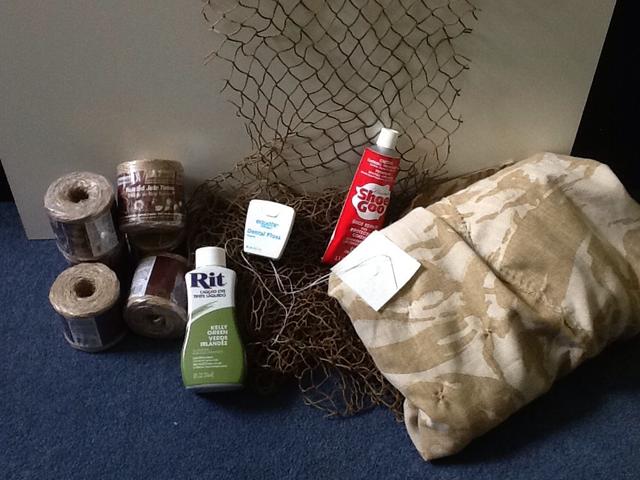
- Synthetic Ghillie Poncho Kit
- Poly-cord craft netting
- Camouflage burlap
- Netting/jute twine
- Heavy-duty sewing needle
- or Dental floss
- Braided super line
- Silk/synthetic leaves
- Shoe glue
DIY: 5 Steps Make Your Own Military Ghillie suit?
You can make a ghillie tactical suit either buy a Synthetic Ghillie Poncho Kit or by utilizing the old camouflage/netting, shirts, pants, jackets, burlap, but unfortunately, they will not be as lightweight as synthetic jute.
Step 1: Sort the netting and the string
Buy a roll of replacement fishing net and cut it into strips with the width of two squares. Using dental floss or needle, sew these strips down the sleeves and the front of the jacket, leaving a gap of 6”-8” between strips. After that, seal the stitches with shoe glue.
Step 2: Ready the Burlap
The Burlap strands cover a traditional ghillie camouflage suit. For this step, you need between 4 and 8 pounds of material for each suit. If you can’t find burlap, use braided jute twine in natural colors and separate each braid into individual fibers.
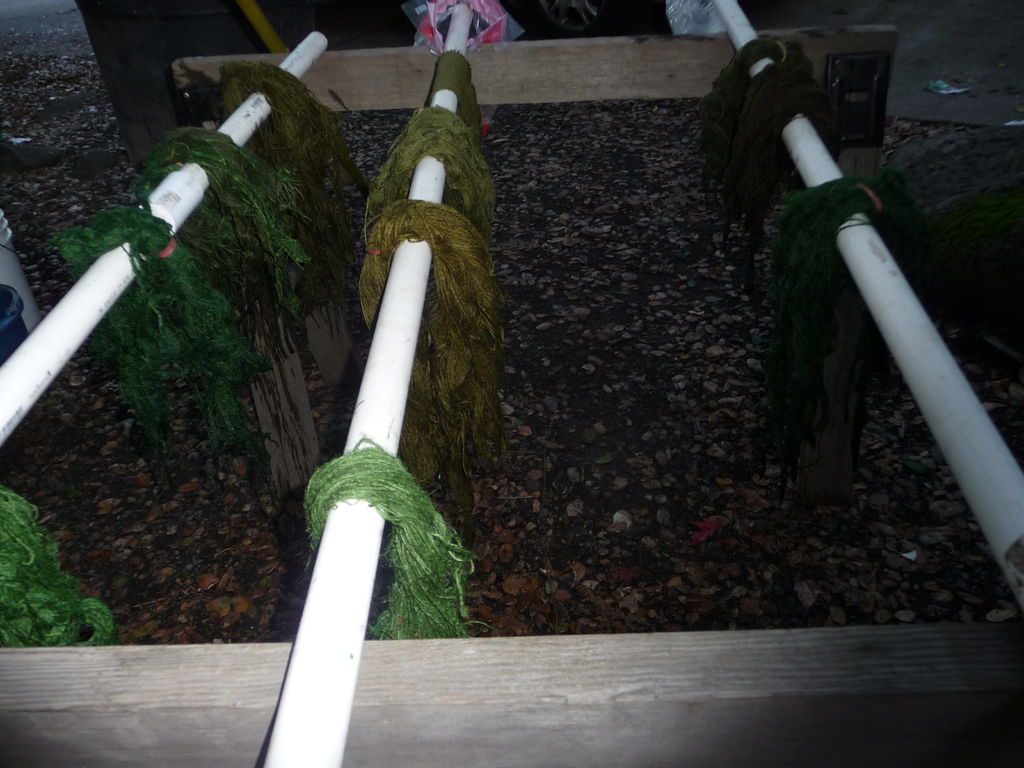
Pull the burlap string apart and cut the string into 20”-30” sections to make the material ready for dyeing (dye the suit in accordance with the surroundings, you will use the ghillie survival suit in). Apply this same process to any of the nets you use – if the fabric is light-coloured, prepare to dye it if applicable.
Step 3: Separate the strands
Undo the knitted burlap into individual strands, but it is the most time-consuming part. Cut the strips of burlap and then unravel the cross-linked fibres. Then, separate them into strands of equal length. The longer strands will go on the sleeves and the front of the suit despite the shorter strands will overlap down the back.
Using hot glue is an easy way to attach layers of mesh and string together. For long-lasting durability, you can add a reinforcing stitch. To tie and secure fabrics, you can use the dental floss as it is a strong thread that will not fray. To attach the string to your suit, tying knots is a great way. Remember to keep the strands short for a natural look.
To make the suit appear camouflaged, design the suit in a random pattern. Be mindful of the things that could easily catch on sharp obstacles resulting in a tear or rip in your camouflage suit. Secure these potential hazards, so that you can brush up against trees, branches, or sharp rocks without getting your suit caught.
Step 4: Tie in the Burlap
In this step, you are ready to tie the burlap strands into the netting. Take 10-15 strands and fold the bunch in half, then push the loop under each vertical square of netting. Through the loop, draw the hanging ends of the bunch and pull tight. Lastly, start at the bottom and work upward and make sure that each row overlaps the one beneath it.
Step 5: Ghillie hood
Since you know how to make a ghillie suit, so don’t forget to complete your outfit with the ghillie hood. The ghillie hood will make your presence undetectable. You can utilize the mesh netting you already have and drape the fabric over your head like a veil or attach the mesh netting to a camouflage hat. Tie-dyed fabrics and strings to your hood piece, similar to the way you attached the pieces to your suit. Don’t forget to keep the hood density and bulkiness the same as the ghillie camouflage suit.
You May like to read Be sure to see our post on Ultimate Ghillie Suits To Make Hunting Better
Features of the Camouflage Suit
You will have the most effective camouflage suit if you are aware of the important features it should have.
- High quality and long-lasting use
- The Ultimate Lightweight and heavy camouflage concealment
- Comfortable yet strong and durable
- Includes 3 Pieces: hood, jacket and pants
- Elastic string in pant waist
- Utilized Ghillie outfit for hunting, shooting, wild-fowling, paintball, air-soft, and surveillance, etc.
- Premium breathability
- Wild application
- Lightweight and strong
- Outstanding protection in the surroundings
- Common color: army or alive green
- Serves tactical benefits over the opposition
- Hand washable and elastic
Tips to Wear a Ghillie Hunting Suit
- Consider the environment in which you will use the ghillie survival suit. Lack of some colours related to the environment is acceptable, but adding more vibrant colors will get you spotted easily.
- Take care to use extra material on your head, neck, and shoulders as your objective is to eliminate the human silhouette.
- Perform a “Ghillie Wash” which means that once you have tied all of your jute to your netting, soak the suit in the water. Then, crawl through the mud, grass and even drag it behind a vehicle. This process will break in the jute and adds Earth and vegetation to it.
- If you use the suit for more than 3 days, remember to add more organic material to maintain a bulky and natural appearance.
- Olive or army Green ghillie suit is the best piece to use.
Related Pick: Top Animals In The World That Camouflage
Safety Considerations
Although ghillie military suits are highly effective and are impractical for many situations where camouflage is useful. They are very hot and heavy, even in moderate climates. Likewise, the temperature can reach over 50°C. Coupled with this, the burlap is also flammable, unless it is treated with fire-retardant. If the flammability of the burlap is not taken into the notice, the wearer may be at risk from ignition sources such as smoke grenades or white phosphorus.
To enhance the safety standards, the US Army Soldier Systems Center (ASSC) has developed a fire-resistant fabric to replace the jute or burlap. This material was tested in late 2007 and has been a standard-issue since June 2008.
Things to Avoid:
- Don’t get too close to the bushes. If a branch sticks through your suit and into the netting, there is no surreptitious way to get rid of the branch.
- Separated burlap or jute is very flammable, so add a soluble flame retardant to the dye water.
- You also have to find the best fit for your complete body and always take care of your suit when it is wet.
Conclusion
Hopefully, this information will be helpful as you learn about how to make a ghillie tactical suit at home in easy steps. Utilizing quality materials is essential as they will not break down over time.
Moreover, having a homemade ghillie dress is economical, enables you to customize the suit and ensures that you have the perfect color scheme that matches the surroundings.